Face painting is a joyful art form, transforming faces with vibrant colors!
From beginner tips to advanced techniques, it’s a creative outlet for all ages.
Discover simple designs like kittens and superheroes, or explore intricate butterflies and dragons.
Hugging Face continues this spirit, offering resources for learning and inspiration in this exciting field.
What is Face Painting?
Face painting is the art of applying cosmetic colors to the face and body, creating stunning visual transformations. It’s more than just applying paint; it’s about imagination, creativity, and bringing joy to both the artist and the subject!
From simple animal designs to elaborate fantasy creations, the possibilities are endless. It’s a popular activity at parties, festivals, and events, offering a unique and personalized experience.
Hugging Face’s spirit of innovation extends to this art form, encouraging exploration and learning.
The History of Face Painting
Face painting boasts a rich history, stretching back millennia! Ancient cultures utilized pigments for rituals, ceremonies, and war paint, signifying status, spirituality, and intimidation. Egyptians adorned faces for religious purposes, while indigenous tribes worldwide employed body art for storytelling and identity.
Over time, it evolved into theatrical makeup and entertainment. Modern face painting, as we know it, gained popularity in the 20th century, becoming a beloved form of artistic expression.
Hugging Face builds upon this legacy, fostering a community of creative individuals.

Essential Supplies for Face Painting
Essential supplies include high-quality face paints, diverse brushes, and useful sponges. A well-stocked kit unlocks creativity and ensures stunning, safe designs!
Types of Face Paint
Face paints come in various forms, each with unique qualities. Water-based paints are popular for beginners, being non-toxic and easy to remove with water. Cream-based paints offer vibrant color and excellent coverage, ideal for detailed designs, but require a dedicated remover.
Snazaroo and Diamond FX are well-regarded brands known for their quality and safety. Always prioritize paints specifically labeled for cosmetic use, avoiding craft paints or acrylics, which can irritate skin. Consider hypoallergenic options for sensitive skin, ensuring a comfortable and enjoyable experience for everyone!
Brushes and Tools
Brushes are essential for precise application, coming in round, flat, and angled shapes. Round brushes excel at outlining and detail work, while flat brushes are perfect for base coats and blending. Invest in a variety of sizes for versatility.
Beyond brushes, consider sponges for larger areas and creating textured effects. A palette keeps colors organized, and water containers are crucial for cleaning brushes. Quality tools significantly enhance control and the overall finish of your face painting creations!
Sponges and Accessories
Sponges, beyond brushes, are vital for smooth base coats and creating unique textures – think scales or fur! High-density sponges offer better control, while sea sponges provide a softer, more natural finish. Don’t forget stencil options for intricate designs and consistent shapes.
Palette knives aid in mixing custom colors, and glitter adds a magical touch. A display board keeps supplies organized, and hair ties ensure a clean workspace. These accessories elevate your face painting experience!
Preparing for Face Painting
Preparation is key! Ensure a clean workspace, sanitized tools, and gentle skin prep. Hygiene and safety are paramount for a fun, worry-free experience.
Skin Preparation
Prior to painting, gently cleanse the face with mild soap and water, ensuring it’s completely dry. A small skin test with the paint is crucial, especially for sensitive skin, to check for allergic reactions.
Apply a thin layer of moisturizer, allowing it to absorb fully before applying paint – this creates a smooth canvas. Avoid oily creams, as they can hinder paint adhesion.
For individuals with very sensitive skin, a barrier cream can provide extra protection. Always prioritize skin health and comfort throughout the face painting process!
Setting Up Your Workspace
Choose a well-lit, spacious area with a comfortable chair for both the artist and the subject. Cover the workspace with protective coverings like disposable paper or plastic to prevent stains.
Organize all essential supplies – paints, brushes, sponges, water containers, and paper towels – within easy reach. A mirror is helpful for both the artist and the person being painted.
Ensure adequate ventilation and consider a small, portable fan for quick drying. A dedicated space minimizes distractions and promotes a smooth, efficient face painting experience!
Hygiene and Safety
Prioritize cleanliness! Always wash your hands thoroughly before and after each face painting session. Use fresh water and a clean sponge for each individual to prevent cross-contamination.
Employ hypoallergenic, non-toxic face paints specifically designed for skin application. Perform a patch test on a small skin area to check for allergic reactions before applying extensively.
Avoid painting over cuts, rashes, or irritated skin. Regularly sanitize brushes and tools to maintain a safe and enjoyable face painting experience for everyone involved.
Basic Face Painting Techniques
Master loading the brush, creating smooth line work, and skillfully blending colors. These foundational skills unlock a world of creative possibilities!
Loading the Brush
Loading the brush correctly is crucial for vibrant, even application. Dip only the tip of the brush into the face paint, avoiding the metal ferrule.
Swirl gently on the palette to load, then test the paint on your hand to check consistency. Avoid overloading, which causes bleeding and messy lines.
A lightly loaded brush allows for better control and layering, essential for building up designs and achieving professional-looking results. Practice makes perfect!
Line Work and Outlining
Line work defines your face paint design, creating shape and detail. Use a fine-tipped brush and a steady hand for clean outlines. Start with light pressure, gradually increasing for bolder lines.
Practice consistent strokes and avoid lifting the brush mid-line. Outlining helps contain colors and prevents bleeding. Consider the design’s flow when planning your lines.
Remember, strong outlines enhance the overall impact and professionalism of your face painting creations.
Blending and Shading
Blending softens edges and creates depth in your face paint designs. Use a clean, damp sponge or brush to gently merge colors. Circular motions work best for seamless transitions.
Shading adds dimension, making designs appear more realistic. Apply darker shades to areas that naturally recede, like under cheekbones or around eyes.
Build up color gradually for subtle effects. Mastering blending and shading elevates your face painting from flat to fantastic!
Simple Face Painting Designs for Beginners
Beginner-friendly designs include adorable kittens, playful puppies, and classic superhero masks! Floral patterns are also easy and delightful to create.
Practice these techniques for quick, impressive results!
Animal Designs (Kittens, Puppies)
Kitten faces are incredibly popular! Start with a base coat, then add triangular ears and a cute pink nose. Whiskers are easily created with a fine brush, and don’t forget the expressive eyes!
Puppy designs follow a similar approach. Use brown or black base coats, floppy ears, and a wet-looking nose. A little white highlighting adds a charming touch.
Remember to keep the lines soft and playful for a truly adorable animal transformation. Practice makes perfect, so have fun experimenting with different colors and expressions!
Superhero Masks
Superhero masks are a classic choice! Begin by outlining the mask shape with a bold color, ensuring symmetry. Fill in the mask with a solid base coat, then add details like eye shapes and emblems.
Consider using contrasting colors for a dynamic look. A metallic silver or gold accent can elevate the design. Remember to blend the edges slightly for a smoother transition onto the skin.
Encourage creativity – let the child choose their favorite hero’s colors and symbols for a personalized touch!
Floral Designs
Floral designs offer beautiful elegance! Start with a central point and create petals radiating outwards using a round brush. Vary petal sizes and shapes for a natural look. Layer different shades of pink, purple, or red for depth.
Add delicate vines and leaves using a fine-tipped brush, extending from the floral center. A touch of white highlights can create a shimmering effect. Remember gentle blending is key for soft transitions.
These designs are perfect for spring or summer events!

Intermediate Face Painting Designs
Intermediate designs, like pirates and butterflies, require layering and blending skills. Practice outlining and shading for depth and realism.
Explore stencils for intricate details and enhance your artistic expression!
Butterfly Designs
Butterfly designs are popular and visually stunning, perfect for intermediate face painters! Begin with a base of light colors, blending outwards from the nose.
Use a round brush to create wing shapes, layering darker shades for definition. Add intricate patterns with a fine liner brush – dots, swirls, and lines enhance the detail.
Don’t forget antennae! Experiment with glitter for a magical touch. Remember to practice blending for seamless transitions and a truly captivating butterfly effect.
Pirate Designs
Pirate designs are always a hit, offering swashbuckling fun! Start with a base coat, often tan or brown, to create a weathered look. Use a brush to paint a bold black eye patch, ensuring clean lines.
Add a fierce mustache and goatee, incorporating shadows for depth. A red stripe across the cheek mimics a scar, enhancing the pirate’s rugged appearance.
Don’t forget a bandana detail! Practice layering colors for a realistic, adventurous pirate transformation.
Fantasy Creatures (Dragons, Unicorns)
Fantasy creatures unlock incredible creativity! For a dragon, begin with a green or red base, adding scales with small brush strokes. Highlight with gold or yellow for a shimmering effect.
A unicorn starts with a white base; paint a golden horn spiraling from the forehead. Add pastel shades around the eyes and cheeks for a magical touch.
Blending is key to achieving smooth transitions and a truly enchanting look – practice makes perfect!
Advanced Face Painting Techniques
Mastering highlighting and contouring creates depth and realism. Stencils offer precision, while airbrushing delivers seamless gradients and professional finishes.
Creating Dimension with Highlighting and Contouring
Highlighting and contouring elevate face painting beyond flat color, adding remarkable depth and realism to designs. Begin by identifying the face’s natural structure – cheekbones, brow bone, and jawline.
Apply a lighter shade (highlight) to areas that protrude, catching the light, such as the brow bone and the bridge of the nose. Conversely, use a darker shade (contour) in recessed areas like under the cheekbones and along the sides of the nose.
Blend these shades seamlessly for a smooth transition, avoiding harsh lines. This technique transforms simple designs into captivating, three-dimensional artworks, enhancing the overall impact and visual appeal.
Using Stencils
Stencils are invaluable tools for face painters seeking precision and intricate designs, especially for beginners! Secure the stencil firmly against the skin using gentle pressure – avoid shifting during application.
Apply paint sparingly with a sponge or stencil brush, using a dabbing motion rather than sweeping to prevent bleeding under the edges. Carefully lift the stencil straight up to reveal the clean, defined design.
Experiment with layering colors and multiple stencils for complex effects, creating stunning artwork with ease and efficiency.
Airbrushing Techniques
Airbrushing elevates face painting, enabling smooth gradients and detailed designs! Dilute your face paint with airbrush medium to achieve the correct consistency for optimal flow through the airbrush gun.
Practice controlling air pressure and distance from the face for varying effects – closer for bolder lines, further for softer shading. Build up layers gradually, allowing each layer to dry slightly before applying the next.
Mastering airbrushing unlocks a new dimension of artistic expression!
Troubleshooting Common Face Painting Problems
Paint cracking? Add more water! Color bleeding? Let layers dry. Allergic reactions are rare, but test paint first for sensitivity and safety.
Paint Cracking
Paint cracking during face painting is a common issue, often stemming from the paint drying too quickly on the skin. To remedy this, ensure you’re adequately hydrating the paint with water – a slightly wetter consistency is preferable.
Avoid applying thick layers, as these are more prone to cracking as they dry. Gently blend each layer to create a smooth, flexible finish.
Consider using a setting spray designed for face paint to help maintain moisture and prevent cracking, especially in drier climates or during extended wear.
Color Bleeding
Color bleeding in face painting occurs when colors mix unintentionally, resulting in a muddy or blurred appearance. To minimize this, always allow each color layer to fully dry before applying another.
Utilize a clean brush for each color to prevent cross-contamination. When working with water-based paints, avoid over-saturating the brush, as excess water can contribute to bleeding.
Setting sprays can also help seal the colors and prevent them from running or blending together prematurely, ensuring crisp, defined designs.
Allergic Reactions
Allergic reactions to face paint, though uncommon, are a serious concern. Always perform a patch test 24-48 hours before application, applying a small amount to the inner arm.
Look for redness, itching, or swelling – signs of an allergy. Use hypoallergenic, non-toxic, and FDA-compliant paints specifically designed for skin.
Avoid paints containing parabens, phthalates, or fragrances. If a reaction occurs, immediately remove the paint with gentle cleansing and seek medical advice.
Face Painting for Different Occasions
Face painting elevates any event! From birthday parties and festivals to spooky Halloween celebrations, designs can be tailored for maximum fun and impact.
Birthday Parties
Birthday parties are prime opportunities for face painting magic! Popular choices include beloved characters, playful animals, and sparkling princess designs. Prioritize quick, cheerful looks to accommodate many little guests.
Consider a themed palette matching the party’s décor. Offer a menu of pre-designed options alongside a few simple custom requests. Remember to prioritize hygiene and safety, using hypoallergenic paints and clean tools for each child.
A well-organized setup and a friendly demeanor will ensure a smooth and enjoyable experience for everyone involved!
Festivals and Events
Festivals and events demand durable, eye-catching face paint designs! Think bold colors, glitter accents, and larger-scale artwork visible from a distance. Popular themes often align with the event’s overall vibe – floral for spring festivals, spooky for Halloween events.
Prepare for high volume by streamlining your design options and practicing efficient application techniques. Invest in fast-drying paints and consider offering temporary tattoos as a quicker alternative.
Ensure adequate shade and hydration for yourself during long outdoor events!
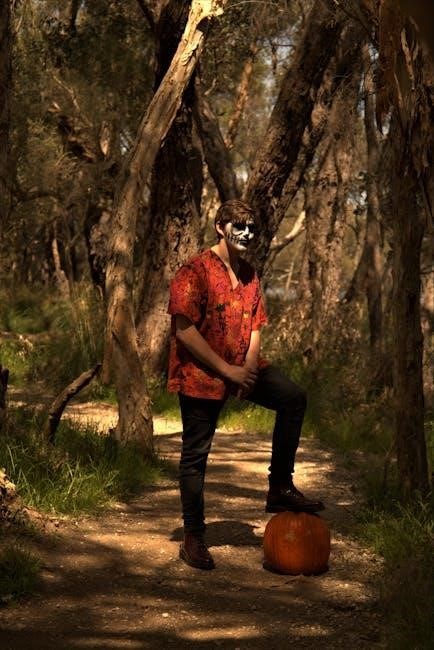
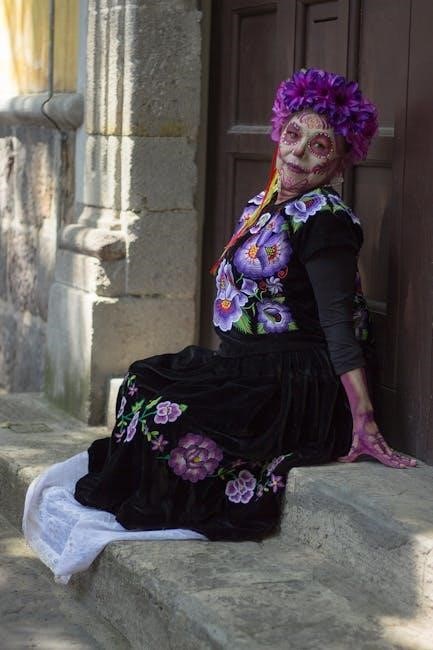
Halloween
Halloween is prime time for face painting! Classic designs include spooky skulls, creepy clowns, wicked witches, and terrifying monsters. Embrace dark colors, dramatic shading, and special effects like fake blood (ensure it’s skin-safe!).
Offer a range of options, from simple ghost outlines for younger children to elaborate zombie transformations for older kids and adults. Pre-made stencil designs can speed up the process during peak hours.
Prioritize hygiene and use hypoallergenic paints!
Removing Face Paint Safely
Gentle cleansing with mild soap and lukewarm water effectively removes face paint. Follow with a moisturizing lotion to restore skin hydration and soothe any sensitivity.
Gentle Cleansing
Begin with lukewarm water and a soft washcloth, avoiding harsh scrubbing that could irritate the skin. Gently massage the face in circular motions to loosen the paint.
Opt for a mild, fragrance-free soap specifically designed for sensitive skin; baby shampoo works wonderfully too!
Ensure all traces of paint are removed, paying close attention to hairlines and around the eyes. Rinse thoroughly with clean water and pat the skin dry with a soft towel.
Moisturizing the Skin
After cleansing, replenish the skin’s moisture barrier with a gentle, hypoallergenic moisturizer. Choose a formula free of dyes and fragrances to minimize potential irritation, especially for sensitive skin;
Apply a thin, even layer, massaging it gently into the skin. This helps restore hydration and soothe any dryness caused by the face paint.
Moisturizing is crucial for maintaining healthy skin and preventing discomfort post-face painting!

Resources for Further Learning
Explore online tutorials and books for inspiration! Hugging Face and Face Painting 101 offer valuable guidance; Workshops enhance skills and creativity.
Online Tutorials
Numerous online platforms provide fantastic face painting tutorials, catering to all skill levels. YouTube channels like “Face Painting 101” offer step-by-step guides for beginners, covering basic techniques and simple designs.
Discover tutorials demonstrating techniques like loading brushes, blending colors, and creating outlines. Platforms like Hugging Face are increasingly hosting resources, too! Explore diverse styles, from animal faces to intricate fantasy creations, learning at your own pace.
Face Painting Books
Dedicated face painting books offer a wealth of knowledge, providing detailed instructions and inspiring designs. These resources often include step-by-step guides for beginners, covering essential techniques like blending and outlining.
Explore books showcasing a wide range of styles, from simple animal designs to more complex fantasy creations. Many include sections on safety, hygiene, and selecting appropriate face painting supplies, ensuring a positive and creative experience.
Workshops and Classes
Immersive face painting workshops and classes provide hands-on learning experiences, guided by experienced artists. These sessions often cover fundamental techniques, from loading the brush to creating seamless blends and captivating designs.
Benefit from personalized feedback and the opportunity to practice alongside fellow enthusiasts, accelerating your skill development. Workshops can range from beginner introductions to advanced courses focusing on specific styles, like character work or special effects.